If you have more than one child and live in a small house like us, you may be running out of places for your children to find some quiet time away from their siblings. We have a small walk-in closet that was just being used as a catchall, so we decided to turn it into a cozy book nook where one or two of them could sit and read without disturbances or distractions.
I thought putting together this DIY reading nook would be a huge undertaking, but it was easier than I thought it. The most difficult parts were prepping the closet and organizing the books (our children have way too many books).
How to prep your closet to house a book nook . . .
A. Empty out the closet completely. (You should have seen all the things our children rediscovered during this process.)
B. Remove the closet door.
C. Remove any bars, hardware, and hooks from the walls.
D. Make sure the existing closet light is sufficient for reading. If not, change it or add additional lighting. You could add a cordless LED lamp, a clip-on book light, or even a flashlight (kids love reading with flashlights).
E. If the walls are not to your liking (ours were pink), paint them a light, warm color. Choosing a dark color for the walls will cause the nook to feel smaller and darker than it needs to be.
F. Hate the floor in your closet? Don't worry, we'll cover that later.
Once you have all the prepping out of the way, then the fun begins! You'll be on your way to having a cozy book nook in no time.
Pin This DIY Book Nook project for later . . .
10 Things You'll Need to Create a Cozy Closet Book Nook . . .
1. X-large Dog Bed - I explored many options and, after measuring the closet floor, I decided that this jumbo dog bed was the least expensive, most effective, and easiest way to create cushy seating on the closet floor.
2. Two Large Bolster Pillows - Place two cylindrical pillows the size of body pillows in one corner of the closet to create a right angle. (We purchased ours at Sears for under $20 each during back-to-college dorm shopping season.)
3. Book or Reading-Themed Throw Pillows - I had looked around for toss pillows with a reading theme for awhile, but could not find anything that was more than just typography, until I took a look at the throw pillows on Zazzle. With all the designs, shapes, and sizes to choose from, I was like a kid in a candy store. I ultimately chose the square 20" Library throw pillow, the square 20" Dragon Magically Appearing from Books throw pillow, and the Cute Bookworm round pillow. They were exactly what I was looking for our 3 tweens . . . cute, but not too cutesie.
4. Soft Cuddly Throw Blanket - You can use a throw you already have or buy a new one, but a cuddly throw is a must for ensuring your little reader is comfortable and will want to stay put to read on. You should be able to find a plush throw for around $10. We found ours for less than $10 at Walgreens of all places during back-to-college season.
5. Window Wall Decal - Because the nook is in such a small space, a window decal will give the illusion of something beyond that wall. It also may spark your child's imagination about being in another place, something that is needed when he or she is fully immersed in a great book. Window wall decals come in a huge variety of styles and sizes. Our small 28"x20" forest view window wall decal cost us less than $6 shipped.
6. Sheer Curtain Panel - Hang a full length sheer curtain panel over the doorway. This will allow you to see inside the book nook without disturbing your child's reading. It also allows much-needed light to filter into the book nook. A solid door would not do either of these things and would likely make the reading nook feel enclosed and stuffy. A cafe rod with hanging hardware included plus one sheer curtain panel cost us under $10 at Target. We also added an inexpensive metal curtain holdback to pull the curtain to one side, but that is optional, as you can just slide the curtain panel to one side on the curtain rod.
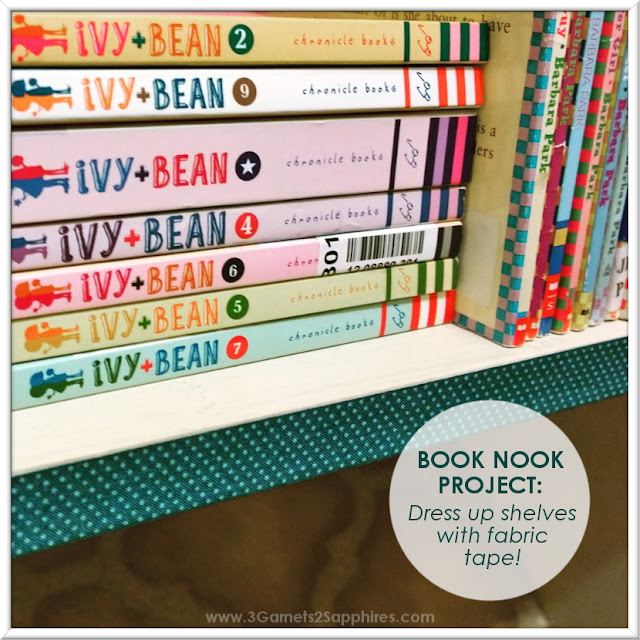
7. Patterned Fabric or Washi Tape - To dress up your closet shelves, trim them by covering the front edge with patterned tape. You'll need to measure the thickness of your shelves, but this .75" pin dot fabric tape fit ours perfectly.
8. Shag Rug - In addition to what you see from the doorway, our closet has additional space to the right. If this is the case for your closet, then you can cover the remaining floor space with a soft shag area rug. Be sure to measure the space. This 2'x3' soft shag rug fit our space perfectly and coordinated well with the jumbo pet bed we chose.
9. Bedrest Pillow + Extra Throw Pillows - Sometimes it's more fun to read with a buddy, so it's a great idea to add extra throw pillows plus a bedrest pillow to create additional seating on the rug. If you shop around, you could probably find a bedrest pillow for about $20. We found ours on sale (in neon yellow) at Target. The extra pillows can be toss pillows you already own if you don't wish to purchase or make new ones.
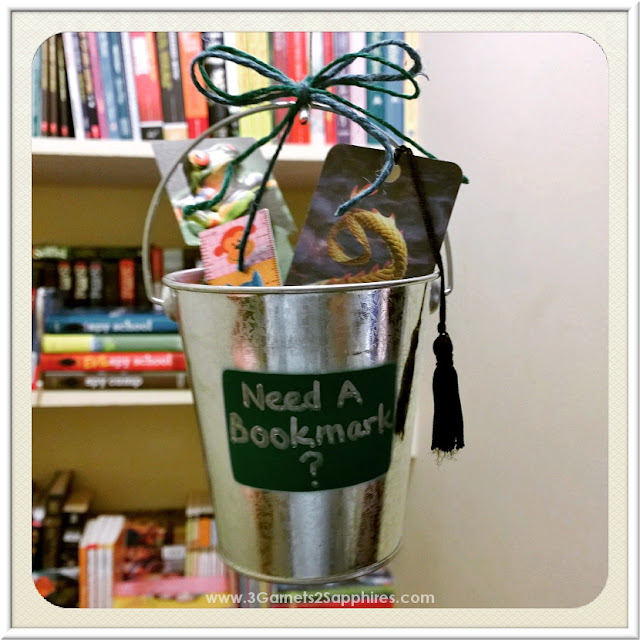
10. Bookmark Bucket - For a special touch, add a little bucket to hold bookmarks so your children are not scrambling to look for one when it's time to stop reading. I found the bucket and the colored string in the Target dollar section. I actually tied our bookmark bucket to the string on the ceiling light. Don't have bookmarks? Checkout my DIY bookmark craft!
Be sure to fill your book nook with books in a variety of genres!
Take all the books from your existing library and add some more in a variety of genres and reading levels. Your local used book stores and library book sales are the perfect places to find new titles to add to your book nook library. We donated a bunch of books and added new titles. This is something we'll have to do regularly, as our book nook shelves are quite full.
What do you think? Was this DIY book nook project easier than you thought it would be? Our children are in love with it so far and have even asked if they could sleep in it. If you have ideas for making a closet book nook even cozier, please share it with us in a comment below.
Share your thoughts about these DIY book nook ideas with us on Facebook!


